Clibu V0.91.0.0 with new Web Components

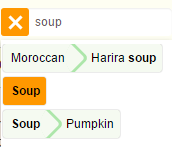
This latest Clibu release focuses on new and improved Article Tagging, Tag Creation, Tag Filtering, autosuggest and new look tags.

The previous implementations have been completely replaced with Web Components.  Web components enable the development of widgets such as the new Clibu autosuggest, that are very easy to reuse both within Clibu and in other applications.

Further the design of these new Web components focuses on widgets that work well on Desktop PC’s as well as on Tablets and Smart phones. The expanding Tags component is an example of this.

When not in use it gets out of the way, occupying a minimum of screen space. It does this without sacrificing usability, simply click  on the button and start typing.

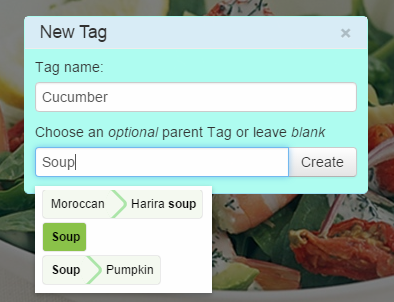
The “New Tag” and “New child Tag” dialogs have also changed. The former to make it quicker and easier to select the parent tag using Tag autosuggest instead of having to scroll through the Tags tree. And the later to make it simpler and clearer.

Further enhancements are planned for the “New Tag” dialog to enable you to add a series of tags  in one go.

Future releases will see the new autosuggest web component used in other areas such as the Knowledge Base menu.

Web Components are very new and have a way to go before they are more widely used and fully implemented in all Web Browsers. That said developing these new components has been a breath of fresh air and I’m excited to see how they evolve and plan to focus future development on them.

Web components are inherently self-contained, which leads to their reusability. With that in mind I’m looking forward to releasing the components I’ve written so far as Open Source, so other developers can use them freely in their applications and in time potentially contribute back and further improve upon the work I’ve done.

In the longer term I’d like to see more and more of Clibu released as Open Source and I see this as a win for Clibu, its users and the broader development community.

Clibu V0.90 now faster and more secure.

Yesterday we released Clibu Version 0.90.00. This entailed moving Clibu to a new physical Server, a new Linux OS more in tune with our use case, and updating our Database to MongoDB Version 3 along with it’s new WiredTiger Database Engine. The entire process went very well with everyone’s databases migrated across with very little downtime.

According to the folks at MongoDB:

Version 3 delivers between 7x and 10x Greater Write Performance, while the new MongoDB WiredTiger storage engine further improves performance for many workloads by implementing concurrency control at the document level.

and

MongoDB now supports native compression with the WiredTiger engine, reducing physical storage footprint by as much as 80%.

Database performance improvements are always welcome, however compression and reduction in storage costs are truly the big winners for us.

We opted to use SSD’s (Solid State Drives) from the very beginning so we can provide the best possible performance to our users. However SSD’s increase our running costs quite a bit and we were maxing out the available server disk space.

With the WiredTiger engine Clibu’s disk space use has dropped from over 90% down to 20% which is impressive indeed.

This is great news as it allows us to continue to grow our user base without blowing out are monthly running costs. A win for you and for us.

Unfortunately there was some pain involved on our part. We had to replace the MongoDB Database driver library we’d been using, as it was no longer being developed and didn’t support MongoDB V3. It was replaced by the official MongoDB Native driver, which is actively maintained and gives us more functionality than we’d previously had. This also gives us peace of mind going forward. This had a flow on effect to some other libraries we were using, triggering further (unplanned) updates. That said the Clibu server has clearly benefitted from all of this work, which flows on to our users.

Finally the migration to a new Linux operating system has also reduced server resources and let us lock everything down a bit more, improving overall security. And we’ve updated Database authentication and access, further improving security and peace of mind.

So you can see we’ve been extremely busy since the last release. That said there isn’t much new to see from our users perspective, but now that all this backend work is behind us, it is time to get back to developing what you, our users want. As always stay tuned.

Thanks for reading,
– Neville

Clibu V0.84.00 – Finding UnTagged Articles …

Clibu Version 0.84.00 has been released and includes some significant updates.

You can now search for all articles that don’t have any Tags using the UnTagged tag.  The UnTagged tag can be used in conjunction with the Starred Article filter and for articles in Trash.

The user interface for Knowledge Base Tabs has been updated to work on devices with narrower screens such as Tablets & Smartphones. When there are more Tabs open than fit on a single row the Tabs that don’t fit are in a Tab with a dropdown menu at the end of the row.

We’ve also completely reworked the Knowledge Base Tabs drag & drop user interface so that it is clearer where the Tab being dragged will drop and so it works on touch devices such as Tablets and Smart phones. You can even drag Tabs to and from and with the new Tabs dropdown menu.

Work continues on Tablet & Smartphone use with some other improvements also in this release.

For more information see the Release Notes.

Clibu Annotations, V0.83.00 Released

We’re starting the new year with a great new release with one important new feature, Annotations.

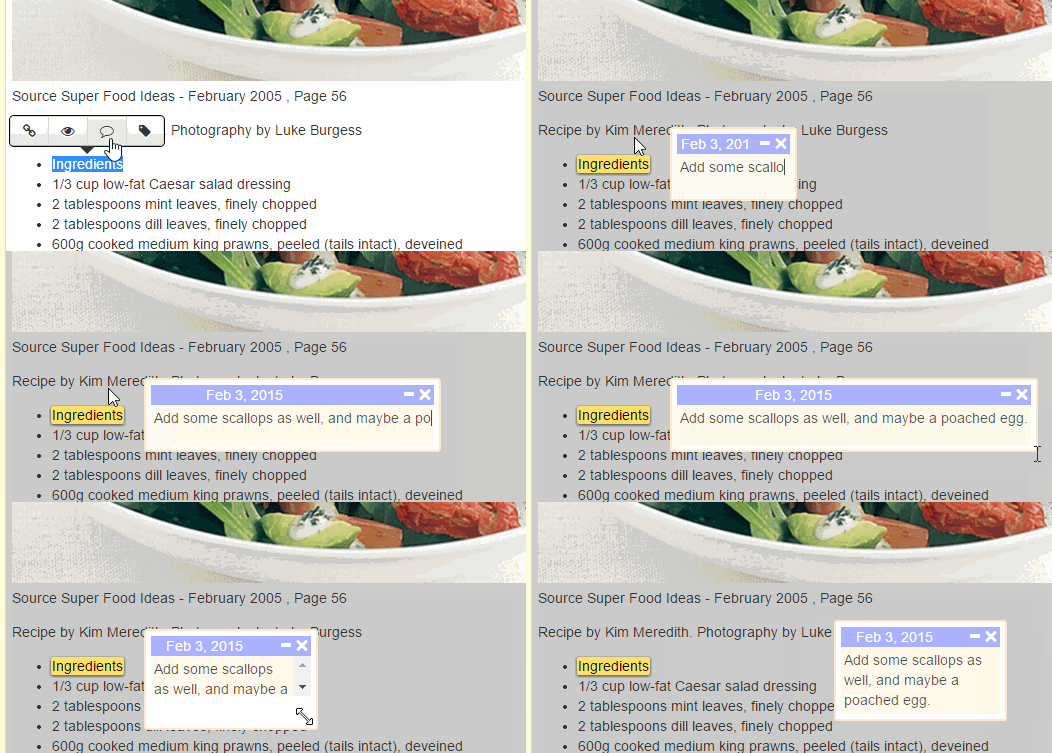
Annotations (or Notes for short) enable you to add content which is typically hidden away out of sight, and can be revealed with a simple mouse click. Notes help you focus on what’s important by reducing visual clutter and making it easy to see additional content as required.

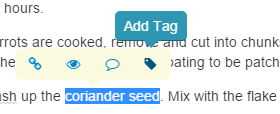
Notes are easy to add, use and manage. To create a Note select some text you want to associate with the note and then click on the Create an ‘Annotation’ button on the floating selection toolbar as shown here.

Notes can contain any content an article can, including images, links, references to other articles and of course other notes!

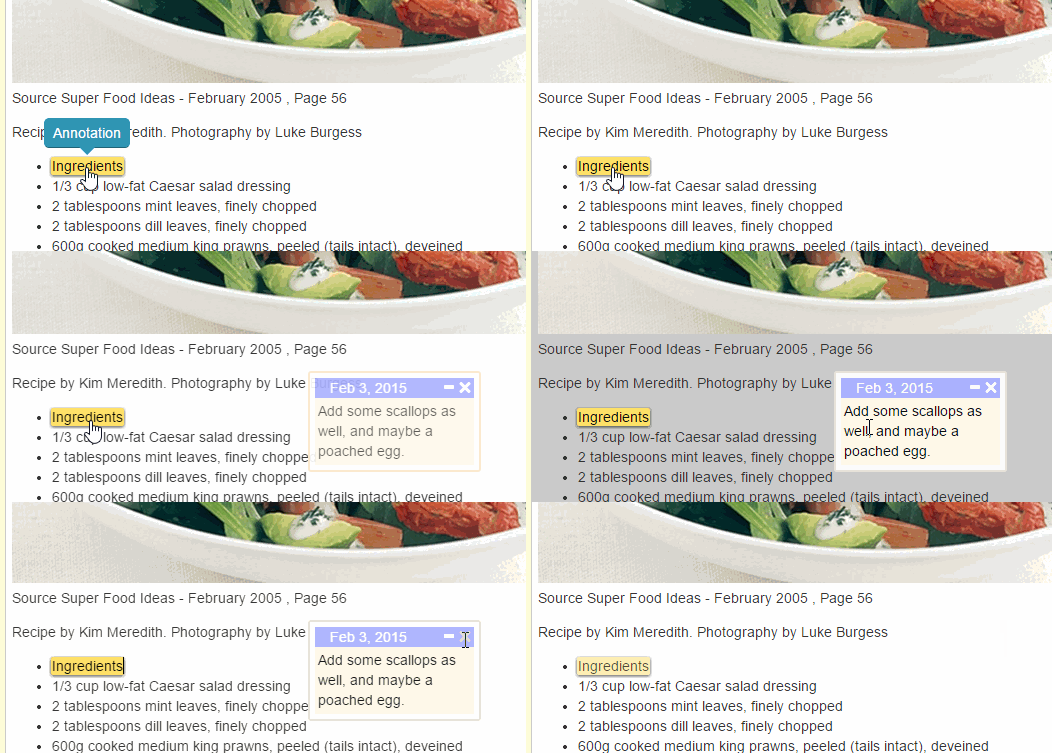
To show and hide notes click on the annotation link associated with the note as shown here.

When a Note is displayed you can also click on its button to hide it.

Notes can be moved around by dragging their title and are positioned relative to their annotation link. So when an annotation link moves, it’s note will follow it.

When you hover the mouse over a note or click on a note to edit it, the article background dims and the notes annotation link highlights to give you a visual connection.

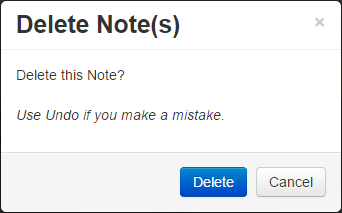
To delete a note click on the button on the Notes title bar which opens the Delete Note(s) dialog.

If a Note contains links to other Notes, then all descendant notes will also be deleted.  If you accidently delete a note use Undo to restore it.

Notes are a convenient way to add meta information which can stand-out, yet remain hidden until called up.

Other improvements in this release include faster application load and startup time, clever screen updating when other users edit articles you are viewing by only updating the changes instead of redisplaying the entire article and some progress on getting Clibu useable on Tablets.

Finally this release addresses a variety of small niggling bugs, some targeted at specific Firefox and IE issues. See the Release Notes for full details.

As always we look forward to and welcome your feedback and comments.

– Neville

Clibu V0.80.65 Released, UI enhancements

This Clibu release incorporates user interface enhancements based on your feedback.

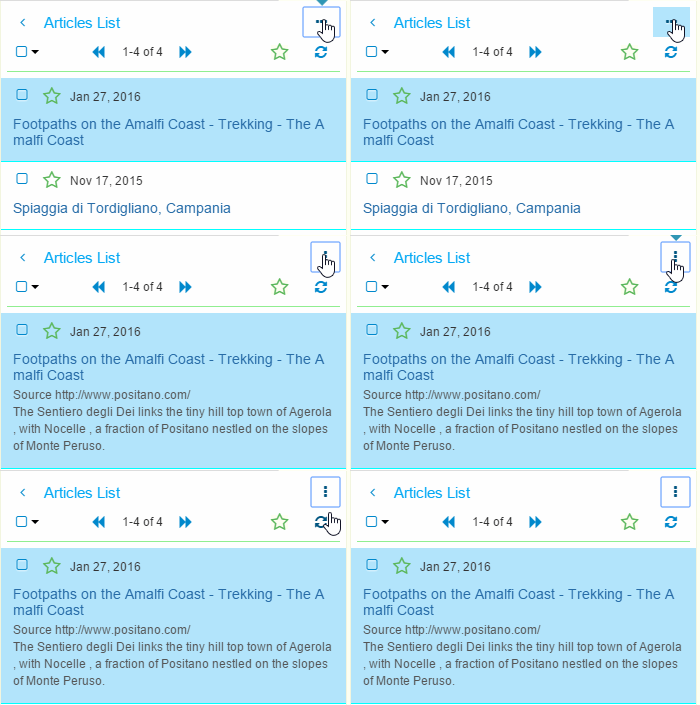
A new button has been added which toggles the way collapsed articles are displayed.

The new compact view displays a line or two from the article and excludes all other article widgets. This lets you see a list with more articles per page.

Next you will see a new button at the left of each article. When you click on this, all articles other than this article, will be hidden. This declutters the screen so it is easier to focus on the task at hand. Click it again to reveal the hidden articles.

When another Clibu users adds an article to a Knowledge Base you have open or when you or another user adds an article using the Clibu Web Clipper, to a KB you have open, you now have the ability to display these articles.

When such articles are added you will see a button like the one shown above displayed on the top navigation bar. Simply click on the button to see the article.

To see a complete list of the updates and issues addressed in this release see the Clibu Release Notes.

Many thanks to all of our Clibu users for your support this past year. Wishing you a very happy Xmas and a healthy and happy 2015.

– Neville

Clibu Version 0.80 A major new release – Knowledge Base Sharing

In Part 1 I wrote about Clibu User and Account Management.  In this post I’ll walk through Clibu’s new Knowledge Base Sharing capabilities.

Sharing enables other people to view and collaborate on Knowledge Base content. Clibu updates all users content in real time, so everyone see’s changes as they occur.

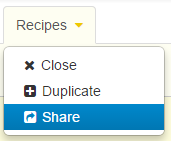
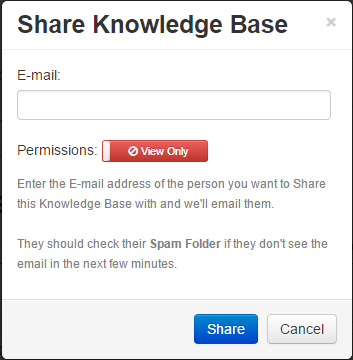
To Share a Knowledge Base, open it and click on it Tab’s drop down menu and select Share.Tab Menu - Share KBThis opens the Share Knowledge Base dialog.

KB Share DialogStart by entering the E-mail address of the person you want to share the Knowledge Base with. They don’t need to be an existing Clibu User.

Next you can either grant them View Only access which means they can look, but not touch or you can grant Full Access, which means they can do everything you can. Click on the button to toggle between the two settings.

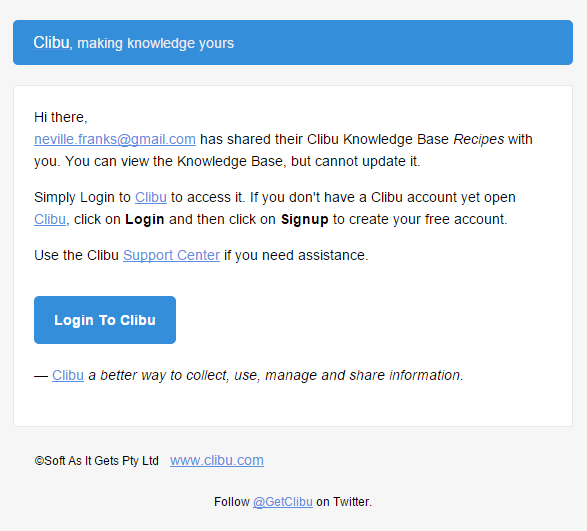
Finally click Share and an email is sent telling the person what they need to do to access the KB. The email looks like this:

Kb Shared Email

If the user you have shared the Knowledge Base with has Clibu open, they will also see a notification to this effect.

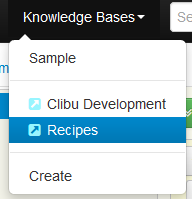
Shared Knowledge Bases are grouped together on the Knowledge Base menu and include an icon indicating they are shared.

KB Menu Shared ItemsThey same icon is used on Tabs that contain shared kb’s.

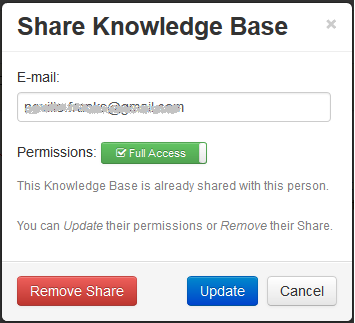
Sharing permissions can be changed at any time and shares can be removed. Select Share on the Tab menu and enter the email address of the person you’ve previously shared the KB with.

From here you can change Permissions and click Update or use Remove Share. The user will be notified by email and also by a notification popup if they are using Clibu.

If they have the KB open it will be closed if Remove Share was used, otherwise it’s permissions will be updated.

At present we’ve exposed just two permissions, Full Access and View Only. However we’ve implemented a much finer grained sets of permissions down to the level of; can a user add Tags, rename Tags, edit Articles, add Articles, create Knowledge Bases etc. etc. Based on user requirements and feedback we’ll look at exposing these advanced permissions in a future release.

I’ve also put the groundwork in place to track user activity, so you’ll be able to see who has edited an article, added tags to it etc.etc. and when.

The ability to collaborate with colleagues and share valuable information is all important. I hope you find this release is heading in the right direction and look forward to your feedback.

– Neville

Clibu Version 0.80, a major new release – User & Account Management

It is time to surface from another big round of Clibu development and get the latest release into your hands. Since the previous release I’ve completely rewritten the User and Account management modules, or to be more precise, written them. Up until now there was very basic Login system, which was just enough to enable folks other than me, to use Clibu.

Fundamental to these new modules is the ability to let you share Knowledge Bases with your friends and colleagues and to have full control over your account.

And we’ve moved from a closed Beta to one where anyone can Signup and start using Clibu straight away.

In the first post I’ll focus on the new Account management capabilities and follow up with a post on Sharing.

CURRENT CLIBU USERS: If you are an existing Clibu User you will see the Login system has changed and you need to establish new credentials. Follow the steps below, your database will be updated and you will be back using Clibu again.

If Clibu is already open or there is any problem you must do a Browser Refresh to load the new release.

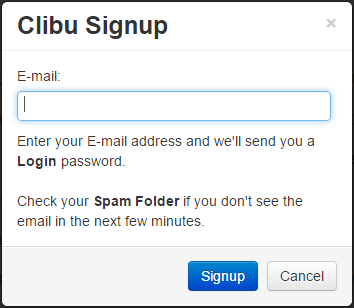
Signing up for a Clibu Account:

Click on the button on the Welcome page or on Signup on the User Login dialog.

Enter your E-mail address and you’ll be sent an email with your login password.

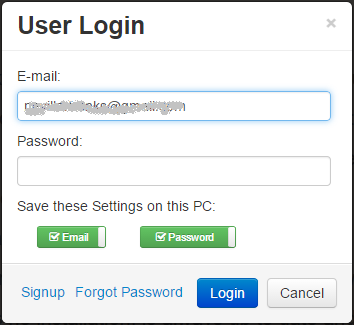
The User Login dialog should open automatically, if not click on the Login button.

The E-mail address you used in Signup will be prefilled. Copy and paste the Password you received in the Signup e-mail.

Next choose whether you want your Email address and/or Password saved on this PC. If both are saved then you can Login in future without having to enter any credentials. If you are using Clibu on someone else’s PC, you should not set these options.

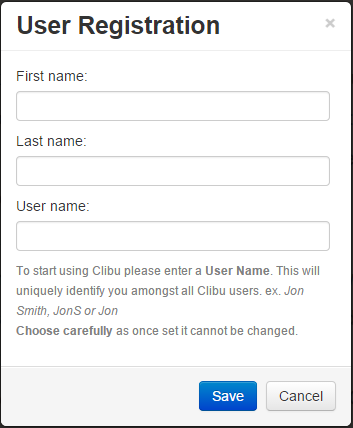
Next Click on Login. As this is the first time you are logging in with this new account there is a final one time User Registration step.

Enter your first name, last name and a User name which will be used to uniquely identify  you amongst all Clibu Users. Note that once set your User name cannot be changed, so choose carefully.

Click Save to complete your Registration and log in to Clibu. If the User name you chose is already in use you will be prompted to change it and try Save again.

When you Register, you get added to our Clibu Newsletter Subscription list. You will receive an email asking you to accept this or not. You can unsubscribe at any time.

Forgot Password

If you look back at the User Login dialog you will see it now includes a Forgot Password option. When you use this, Clibu will create a new temporary password and email it to the address you enter. Your current password will continue to work until you use the new password, which will then supersede it. These temporary passwords expire after 2 days, so use them promptly or use Forgot Password again.

Changing your Credentials

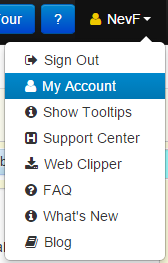
You can change your email address and password on the new Account Details dialog which is accessed from the User Menu | My Account.

If you do set your own password ensure it is a strong one, and not one you use on other Web sites.

Clibu Web Clipper

We’ve updated the Clibu Web Clipper Login to match the changes we’ve made in Clibu. We’ve also simplified it so that if you are logged into Clibu, the Web Clipper Extension will log in automatically, so you can start clipping straight away.

The V0.80.30 Clibu Web Clipper is now available in the Chrome Store. If the Extension doesn’t update on its own then delete the current one and install the latest version from the Chrome Store.

Fini

You can clearly see that we’ve come a long way with User and Account Management in this release. We’ve also paved the way for more User based functionality to be added in future releases. And finally we’ve improved how we manage users on the server and made this more efficient.

Part 2 on Knowledge Base sharing is now available.

For a summary of all updates see this Forum Announcement.

– Neville

New Web Clipper functionality & New Clibu Release

The Clibu Web Clipper has been enhanced to enable you to both add and append Web page content from the Browser right click context menu.

Clibu Web Clipper on Browser Context Menu

In addition to creating new Articles from clipped content you can now append content to an existing article. This is extremely useful  when you want to keep adding bits of information to an article.

The context menu items come in two flavours, depending on whether any content is selected on the Web page or not. If content is selected the menu items above are available and the selected content, along with the web page title linked to the page url, plus the page description (if any) are either used to create a New Article or appended to the current article.

If no web page content is selected then this menu is shown.

In this case the web page title linked to the page url, plus the page description (if any) are either used to create a New Article or appended to the current article.

Clibu and the Clibu Web Clipper are now at Version 0.71.0. Click Browser Refresh in Clibu to get the latest release. And in Google Chrome use Tools | Extension | Update Extensions Now.

Before you can use the Context menu items you need to Login to Clibu using the Clibu Web Clipper Browser button.

Both New Article from Clip and New Article from Bookmark create the article in the Knowledge Base selected in the main popup window accessed via the Clibu Web Clipper Browser button.

Choose the Knowledge Base from the dropdown list and then click anywhere on the web page to close the popup window.

Append Clip to Article and Append Bookmark to Article append  content to the current article. The current article is set in one of two ways. The first way is selecting the article in Clibu using the checkbox beside each article. Whichever article has been selected most recently is the one the web clipper uses.

Clibu Article selection checkbox

The second way an article is treated as selected is whenever you use the context menu items New Article from Clip/Bookmark or Add Article in the web clipper popup window. This enables you to create a new article and then append content to it which is a fairly common task.

If you want to add Tags and edit the page description for New Articles then use the full featured Web Clipper popup.

An issue with selected content in the Web Clipper Popup window has been fixed and links and images in selected content which are relative to the page the content came are now processed correctly.

Clibu itself has been updated to cater for these new Web Clipper capabilities and the Clibu start screen is now displayed when new users access Clibu for the first time and when logging in fails. Links to sign up to the Beta program have been added to the start screen and to the Login dialog. See the Release notes for further details.

I hope you find these new Web Clipper features as useful as I do and look forward to your feedback.

-Neville

Getting content in has to be easy. Clibu V0.70.0 Released

Clibu makes it really easy to lookup information, but just as importantly it has to be easy to add content to your Clibu database, and not just when you’re sitting in front of your PC.

Hot on the heels of the Clibu Web Clipper I’m excited to announce the release of Clibu Version 0.70.0 which enables you to add articles to Clibu by simply emailing them.

I imagine there are a lot of people like me who email themselves snippets of information to follow up on later. This typically happens when I’m out and about somewhere, see or hear something of interest and have my smart phone handy. The problems is that the Inbox of my email program really isn’t the ideal place for these snippets. Wouldn’t it be so much better if they went into my knowledge gathering application Clibu, and now they can.

Getting content into Clibu by email couldn’t be simpler. Select ‘Compose’ in your favourite Email program and set the Email To address to kb@myclibu.com and the Email From address to your Clibu Login email address. The email Subject line enables you to set the Article Title, the target Knowledge Base and a set of Tags. And the body of the email will be the body of the new article.

The Subject line works as follows. Start with the article Title, then if you want to specify a target Knowledge Base use @Knowledge Base Name and finally to add Tags use #tag name1 #tag name2 etc.

The Subject line: Denon AVR-X3000 @Home Theater #AV Receiver #Denon will have a Title: Denon AVR-X3000 and be added to the Knowledge Base named Home Theater and tagged AV Receiver and Denon. For folks moving from Evernote this will be familiar.

If you don’t enter a Knowledge Base name or the name you enter doesn’t exist, the Article will be created in a KB named ‘InBox’. Also any Tags that don’t exist in the target KB will not be added.  Note that Knowledge Base names and tag names are not case sensitive.

A final feature to look forward to is the ability to move articles from one Knowledge Base to another. This will enable you to move articles which go into the InBox KB to where you really want them to live.

As always I hope you like this new Clibu feature and look forward to your feedback.

-Neville

The Clibu Web Clipper has landed

It has been a bit of a journey and took a bit longer than planned, however I’m excited to announce the initial release of the Clibu Web Clipper, Browser Extension.

The Web Clipper makes it quick and easy to capture information from any Web page. This includes the page URL, Title, Description and any content you select on the page. You can also add your own Notes and Tags.

Once installed, you open the Web Clipper by clicking on it’s button on the Browser Toolbar.

Once you’ve logged in you will see the ‘Add Selected Content’ window.

From this window you can select the Clibu Knowledge Base that you want the article added to, add Tags to identify the article and edit or add a Note.

You can also edit the Web Page Title and URL if you want to.

Tags utilize the same auto-suggest capability as Clibu, along with the ability to create new Tags.

One thing I love about the Clibu Web Clipper is that if you have Clibu open, it is automagically updated. Any Tags you create in the Web Clipper will instantly be displayed in the Clibu Tags Tree, and new articles are likewise instantly available.

And this applies to any Clibu’s that are running with your account, be they on your PC or a colleague on the other side of the planet, they are all automagically updated.

Of course this automagic updating is built-into Clibu’s core, so that all instances of Clibu that are open, as well as Clibu Extensions, regardless of where they are, are always up to date and in sync with each other. This is a breath of fresh air compared to the way applications used to work and most still do.

I started development with the expectation we’d have the Web Clipper available for Chrome, Firefox, IE & Safari from day one, however this proved too ambitious and unfortunately the cross-browser extension framework we were using fell short of our expectations. So at the last minute I made the decision to discard the framework and resort to native browser development.

The easiest and best Web Browser to develop extensions for, is by far Chrome, so this first release of the Web Clipper is for Chrome.

To install the Web Clipper select it from the ‘User Menu’ as shown above. If you can’t see ‘Web Clipper’ on the menu then you need to do a Browser Refresh to get the latest version of Clibu.

This is the first release of the Clibu Web Clipper and further capabilities such as capturing entire web pages and adding content to existing articles is planned. If you have other ideas to make an even better web clipper, do let us know.

-Neville